Pull Out Pantry on Wheels

Turning an awkward gap into a pull out pantry!
The Awkward Gap
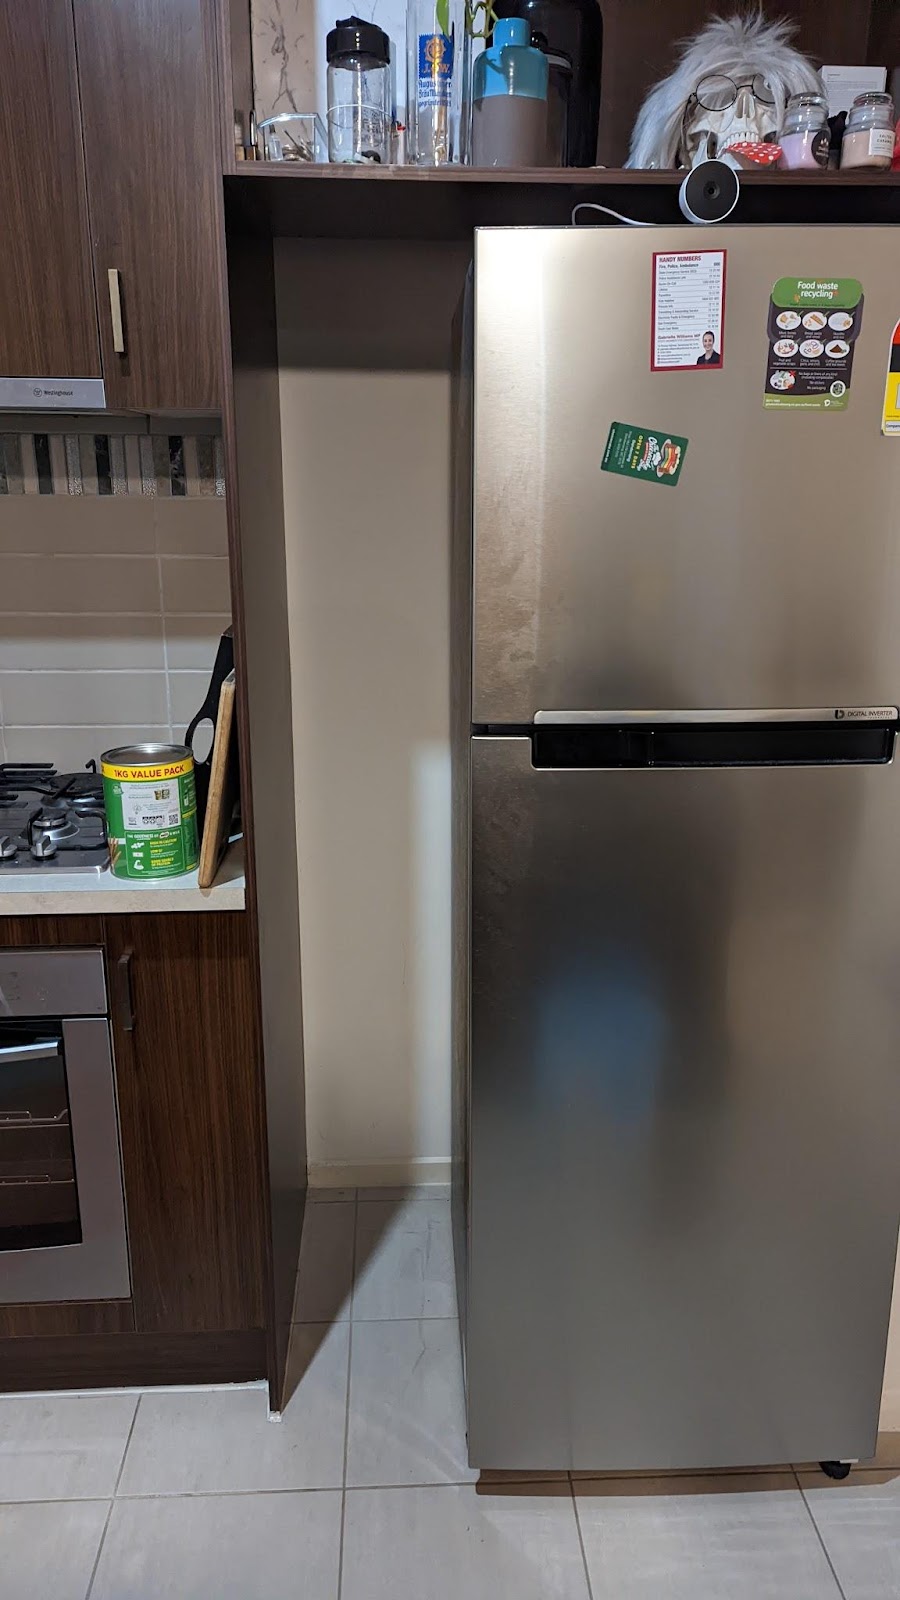
Next to the fridge was an awkward gap. It didn't help that I left spare plastic bags, recycling and sometimes rubbish in the gap. It was just a complete heap of crap that I didn't want to deal with. Every time I walked by the pile of misery, I would think to myself: "I should do something about that". I couldn't find anything that would fit the gap as it was so awkward. So instead of keeping it clean and tidy, I decided to take the opportunity to build something useful.
The research began (and ended) with YouTube
- At the end of this video, the roll out pantry was very wobbly. Due to the height of the shelf, the vertical part acts as a long lever relative to the bottom part.
- Another video where they added a "cross joint" at the back of the shelf to make it more stable. It would consist of two pieces of wood or metal joined together at right angles by overlapping them in the middle.
- This video recommends using wheels that don't swivel at 23:20. The creator also mentioned how the wheels would catch in the groove between the tiles, causing it to bounce a little when you move the shelf in/out.
- This video was pretty clear and straight forward. She did a pretty good job.
- And another video with some pretty good instructions.
The SketchUp Design

I wanted a few additional support brackets but I decided to abandon the idea when I realised how stable it was during the build.
The Materials
The Body
- 4x Pine dressed Premium Grade 285x19mm 1.8M = $172.20 (Note that the thickness is different so I had to make some adjustments. I also asked Bunnings to cut the Pine wood into 6x530mm pieces adjusted to the new thickness)
- Screws Self Drill Zenith 10Gx30 TYP17 = $11.78
The Accessories
- Pine Moulding Square Edging 20x8mm 2.4M = $9.90
- Bracket Angle 25x25x20mm 20 pack = $6.62
- Rectangle Handle 20x10x320MM = $9.50
- 4x Castor Metal Fixed Move it 100mm Black Rubber = 21.80
- Additional Screws
The Varnish
- Paint Brush Monarch Woodcare 63mm = $18.53
- Stain and Varnish Walnut 250ml = $14.50
- Turpentine Minerals Diggers 1L = $5.40
Useful tools
- Kreg Pocket Hole Jig 310 = $40.90
- Hand Drill
- Speed Square
- Spirit Level
- Quick-Grip Clamps
- Sand paper
Total Cost: $311.13 😖
The Build (with Jimmy)

We started with a basic rectangle

We drilled pocket holes under each shelf so we didn't have to cover them up (top shelf was an exception). While drilling, a speed square and some clamps are your best friends to make sure the two pieces are perpendicular. We had four pocket holes on each shelf, a total of 24 pocket holes!

We started from the bottom. If you look closely at the two bottom shelves, we used some scrap wood as 'spacers'.

I actually forgot to account the height of the wheels so we had to cut off some wood. Remember to include the 'extra height' in your calculation!

The body is complete!

After installing the handle bar and pushing it into the gap next to the fridge, we realised that it was too tall! We had to shave off a few millimetres again. The build took us ~6 hours 😝
The Finish

I watched a few videos and attempted to varnish the public facing surface. I kept my brush from drying out by wrapping it in plastic as I waited for the vanish to dry. A tiny bit of sanding between layers makes it extra nice. In the end, I managed to put four layer of vanish over a period of two days.

I installed the extra bit of 'edging' to prevent things from falling off the top two shelves.

It was beautiful!

Are you jealous of my spice rack?
Over all, I was extremely happy with the build. It was a little hard spending $300 but compared to the small miserable shelves I found online, it was worth it. The gap was too narrow for any standard shelf so I felt motivated to make my own custom pull out pantry on wheels! As expected, it was a little 'rocky' and difficult to pull in/out but it doesn't bother me anymore. It took us a long time due to the lack of experience but I was really proud of what we achieved. Big thanks to Jimmy for helping me out during the build!


Comments
Post a Comment